
NEVER Lose Another Seedling with this Hardening Off Process!
This page is a subsection of our Worm Castings 101 - Everything You Need To Know guide. In the 101 guide we cover multiple topics about worm castings, so if you'd like a more thorough walk through of what worm castings are and what they have to offer then click through to read more!
With the temperatures climbing, days getting longer, and our seedlings thriving under the grow lights, it's nearly time to transplant them into the garden. But! If we moved them in one foul swoop from their indoor environment to the garden it would be an incredibly traumatic experience that could result in transplant shock at best and the plant dying at worse. So to ensure it's a smooth transition into their forever home, it's imperative we use a multi-day Hardening Off process.
What is Hardening Off?
Hardening Off is the process of preparing our seedlings for their forever home in the outdoor garden. Over the course of multiple days we will begin bringing our plants outside to get exposure to the intensity and variability of the outdoor garden so that when the day comes to transplant them, they are already familiarized with the outdoor elements such as the sun, wind, and rain.
Going through this multi-day hardening off process ensures that our plants are as well prepared as possible for the garden as possible and increases the likelihood of them having a smooth transition.

After several weeks under the grow lights indoors, our seedlings are ready to begin making their way into the garden for the season ahead!
Why is Hardening Off seedlings important?
Seedlings that have been started indoors have been growing in a very comfortable environment:
- Lighting: They have been receiving a perfectly consistent 12-14hrs of sun per day.
- Temperature: The temperature has been precisely 70f/21c with no fluctuation from day-time to night-time.
- Wind: There has been no wind except for a helpful breeze coming from a fan.
- Rain: They have been watered the perfect amount when needed, resulting in no overwatering nor droughts.
But, when we transplant our seedlings into the outdoor garden we now are at the mercy of Mother Nature:
- Sun: Direct sun will be 10x stronger (or more) than most grow lights.
- Temperature: Every single day the temperature will rise and fall - and potentially to far more extreme highs and lows than indoors.
- Wind: Breezes will be common and much stronger and more powerful winds are not an uncommon occurrence at the beginning of Spring.
- Rain: Especially in Coastal BC, our plants will be exposed to multiple days (sometimes week) of rain - significantly more moisture than what they have experienced thus far!

When do I start hardening seedlings?
The single most important factor to the Hardening Off process is:
The Night-time Low Temperature
In early Spring, at the beginning of the gardening season, the most potential for damage to our plants is in the cold dark middle of night hours. If the temperature drops towards the frost level, our seedlings will either struggle or not survive.

Hardening Off and Transplanting too early runs the risk of adverse weather - both in the form of too much rain and too cold of night-time low temperatures. Transplanting in these conditions presents a significant risk to the plants survival.
So, what temperature is safe?
- For Cool Weather Crops (such as Broccoli, Kale, Peas, etc.) it is safe to begin the hardening off process when the night-time low temperature is 8-celcius (47f).
- For Warm Weather Crops (such as Tomatoes, Peppers, Squash, etc.) it is safe to begin the hardening off process when the night-time low tempearture is 10-celcius (50f).
So before beginning the hardening off process, begin tracking the night-time low temperature either through your local weather app or even more ideally, using a Min-Max Thermometer in your backyard. As you notice the night-time lows getting into the safe zone, it's time to begin the hardening off process.
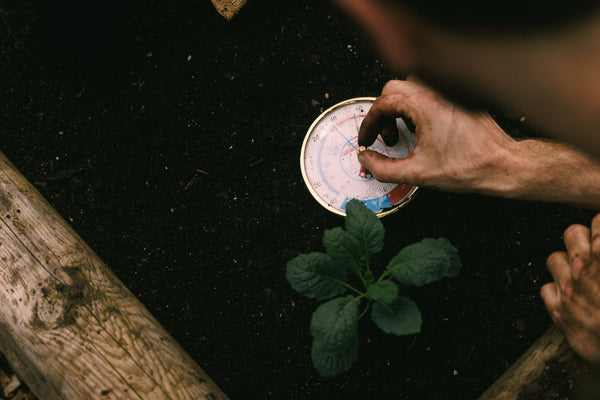
Utilize a Min-Max thermometer in your backyard to intimately understand the Minimum temperature (nighttime low) and Maximum temperature in your back yard.
How long does Hardening Off take?
There is no set number of days for Hardening Off your plants. However, the shorter you go the more risk there is as the plants have had less time to acclimate to the outdoors. Therefore, the method I like to use is a 7-day Hardening Off Process:
- Day 1: Bring your seedlings outside and place them where they would get direct sun for 2 hours. After 2 hours, return them to their indoor environment under the grow lights for the remainder of the Day.
- Day 2: Bring your seedlings back outside but this time for 4hours. After 4hour, bring them back inside and place them under their grow light for the remainder of the day.
- Day 3: Continue the same process, but this time for 6hours.
- Day 4: 10hours
- Day 5: 12hours
- Day 6: Now, rather than bringing your plants back inside you will leave them outside over night (before doing so, double check there isn't a cold-snap planned for that evening and that the night-time low will be in the safe zone depending on the crop you are hardening off).
- Day 7: You will leave your Seedlings outside overnight again.
At the end of Day 7, your plants will have spent two successive nights outside in the garden and are now ready to be transplanted into their forever home!
What comes after Hardening Off seedlings?
As you begin Day 8, you now want to ensure that there is no cold weather in the forecast and begin the process of Transplanting your seedlings into the garden. To do so, follow this checklist:
❏ Double-check the forecast to ensure there are no cold-snaps over the coming 7 days.

By following this 7-day Hardening Off process and keeping a close eye on the night-time low temperatures, 100% of your seedlings will successfully transition into the garden and will be putting on new beautiful foliage growth in no time!