

4 Easy DIY LED Grow Light Stands
I always love the beginning of the year. It’s as if when the clock hits midnight on the previous year that all gardeners begin to come out of their Winter slumber and begin dreaming of the vegetable garden season ahead. Garden Plans are built, Seed lists are created (that are always too ambitious for each of our garden spaces!), and we begin to countdown the days to starting our first seeds.
But as some get their seeds started, they’re left with seedlings that are long and leggy without much foliage and plant to them. Why is that?
It’s because they aren’t getting enough light - one of the most common issues with starting seeds and I’m going to share with you exactly how to solve it.
Do I really need a Grow Light for starting seeds?
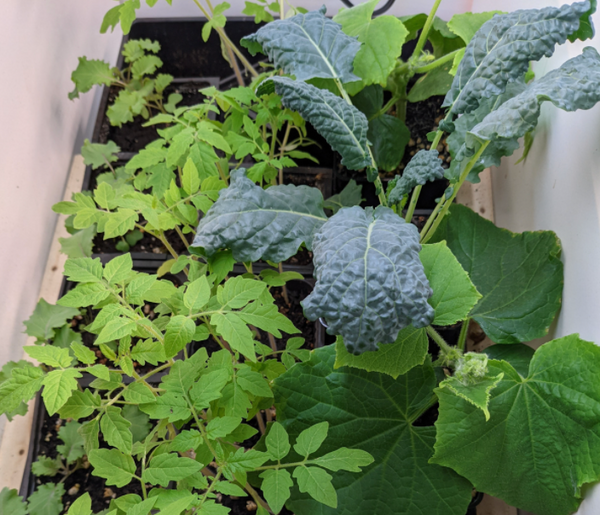
Take a look at the pictures below. Using the Android app LightMeter I am able to see how many lumens are being absorbed. I’ve found that for a vegetable seedling to grow to its fullest potential, it needs to be exposed to about 5,000 lumens for about 12 hours per day. As we can see here, the window sill that these seedlings would be in are only receiving ____ lumens.

This lack of light will result in the plant not having enough energy to grow and ultimately will become long, leggy, and weak. But, look at what happens when I move my phone underneath one of my absolute favorite grow lights.

Voila!
Our previous plant babies now have enough light to grow big and strong. Tangentially, I actually spent hundreds and hundreds of dollars last year buying different grow lights and I enjoyed this exact one so much that we bought a bunch in bulk that can now be purchased on our website.
So, a Grow Light is going to ensure our plant babies thrive from Day 1. But where do you put it?
Why do I need a Grow Light stand for starting seeds?
To ensure your vegetable seedlings are resting nicely beneath the lights and getting the optimal amount of light we need to have the grow light hanging from a grow light stand.
But, each of us have different housing arrangements, amounts of space available, and desires for how many seeds we will be starting so one grow light stand certainly doesn’t suit all.
Because of this, I am going to walk you through 4 different grow light stand options and hope that one of them will fit just right for your space (or at least prompt some ideas on a grow light stand that will work for your indoor growing space!):
- The closet grow light stand
- The countertop grow light stand
- DIY Wooden grow light stand
- Custom grow light stand shelving
Year Round Mindful Gardening by using a Grow Light
One of my personal favourite reasons why I love to use a grow light - beyond the benefits to the plants - is because it allows me to extend my garden sanctuary from the outdoor Spring and Summer garden into the house. By building out a Seed Starting Station with my grow light, I have a little slice of my garden that I can visit during the cold months of the year.
It is such a joy going down to my seed starting station and see my seeds germinate and break through the surface for the first very first time. It always amazes me how small they are in those first few days and see them grow into such big, lush, and bountiful vegetable plants over the season.
A few of my favorite things to keep alongside my grow light in my seed starting station include my worm casting seedling mix, a thermometer, a bit of sage, all of my seeds, and my garden journal for keeping notes from one season to the next.
How expensive are Grow Light Stands?
Depending on the option that you decide to go with, it can cost as little as nothing! That’s because with existing shelving units and rods available, you might be able to string up the grow light stand to an existing shelving unit.
Conversely, if you decide to built a shelving unit to fit perfectly into your home, have varying heights, and incorporate heating and fans it can quickly cost into the hundreds of dollars.
The beauty of this is that you can make a grow light stand work for your space whether you have no money for the project or an infinite budget!
Option 1: Using Existing Shelves as a Grow Light Stand
The first option is to simply use an existing closet or shelving you that you might have on hand. In this instance, all that you need to do is clear out a space to put down your 1020 tray and hang the light over top of them.
On top of the super high quality LED grow light performance, one of the reasons why I love the grow lights available for purchase on our website is because they come with an adjustable extension cord. This allows you to loop it around a rod or shelf and then hang the light below without having to touch a single tool or screw!

Additionally, you can connect multiple grow lights together to convert an entire closet or shelving unit into a seed starting station and indoor growing space, similar to what Jennifer did here.
Option 2: The Cheapest Grow Light Stand Option
Now if an existing closet isn’t an option for you and you’re going to spend a couple dollars (literally) on building out a grow light stand, all you need to do is buy two Screw Hooks such as these:
Once purchased, you can screw them into the ceiling or the bottom of a piece of wood - such as a kitchen cabinet just as Ashley did:

The beauty of this option is that you can very easily instal and remove them, they only cost a few dollars, and then your babies can be on full display for you!
The two primary drawbacks to this grow light stand are that you can be a little bit limited on height and that kitchen counter top real estate might be needed for cooking and dishes!
So, with spending just a little bit more (but still under $20) you can build a DIY Wood Grow Light stand in minutes.
Option 3: DIY Wood Grow Light Stand
What is likely my favorite of the grow light stand options is a very simple DIY Wood Grow Light stand. We have put together a guide with the exact materials and instructions for putting together your DIY Wood Grow Light stand and you can download it here:
And it is SO much easier than you might think. Why is that?
Because nearly every lumber store has saws where they can cut the wood for you. So, all you have to do is grab the right length 2’x4’ for your grow light (this will vary depending on whether you have a 2ft grow light or a 4ft grow light), provide the measurements from the guide to the lumber store, and they will quickly cut it to the exact lengths!
Don’t forget to buy some 3" length screws before leaving and that’s all you need to assemble your new and custom wood grow light stand!
The best part about this is that it takes up such a small footprint and can so easily be moved around your house - ensuring that your plant babies get the perfect home with the perfect amount of light from the beginning of their little vegetable lives!
Option 4: Custom Grow Light Stand
Lastly, if you are looking for something that fits perfectly into your house you’re going to want to take the principles of the third option but customize them to your space. For myself, I had a little alcove by the laundry that was essentially just sitting empty and made for the perfect seed starting station.
So, to bring it to life I measured out the space both in terms of length and width as well as height. From this I knew I could built a three tier seed stating station with grow lights hanging from the bottom of each piece of plywood.
Lastly, I was able to enclose the area with a sheet and put a heater in the bottom to ensure the temperature was always perfect for my plant babies.
If you decide to go down this path, just take the time at the beginning to get your measurements right to ensure you don’t have to buy any lumber twice (not speaking from experience or anything :P)
What else do I need to start seeds indoors?
With your Grow Light Stand built you have the key element to your Seed Starting Station in place. The other items you’ll want to consider having on hand include:
- Seeds: In order to start seeds you need Seeds! I’ve been using West Coast Seeds for the past 4+ years and everything that comes from my garden is from their seeds.
- Seedling Mix: Your plant babies need nutrients, microbes, and moisture retention to germinate and thrive from day 1. This is why our Worm Casting Seedling Mix comes with worm castings and compost perfectly measured and mixed right in. All you need to do is open it up and sow your seeds!
- Seed Cells & Trays: You’ll need seed cells to put the worm casting seedling mix into and 1020 trays to put those seed cells on so that water doesn’t run everywhere.
- Watering: Some people like to use a watering can however I personally love to use a Turkey Baster. I find it really helps to prevent overwatering while simultaneously slowing down the watering process ensuring that the water soaks into the seedling mix opposed to pooling on the top and spilling out the sides of the seed cell
Lastly, if you don’t have those seed starting materials on hand or want to find them individually, then check out our Seed Starting Kit as it comes with everything that you’ll need to successfully start your seeds - so much so that we offer a 100% money back guarantee that you will successfully start seeds!

3 comments
Hello, I’ve watched your video on 4 easy DIY LED grow light stands and am trying to find the link to Option 3: DIY Wood Grow Light Stand – it says to click “here” for the link but there is no link. Would love to have the download to build one like yours. Thank you!
Submitted to download the step-by-step guide.
But no emails as yet.
thank you so much